Ender-3 Pro: Getting it working
March 17, 2022I was recently introduced to the great world of 3D printing first hand when I helped my dad assemble his new printer. Micro Center is currently offering a great deal on these Creality Ender-3 Pro printers (get one for just $100), so it was a no-brainer to pick another one up for myself and experiment with it. If you're anything like me, setting it up to the point where it works and it works well was an absolute nightmare, so I'd like to take this post to go over some of my problems and hopefully alleviate your setup process. If you're here for the steps, jump to the Marlin setup part of this post.
The Ender-3 Pro has proven to be a great starter printer if you can get everything working just right. I've built 3 in the past few days (and disassembled one), and the build process is pretty straight forward. However, there's one kicker to getting yours working that you might have to worry about.
Quality control
First off, I'd like to start by saying that the quality control on these printers is absolutely garbage. Like, terrible. After the experiences I've been through (I will touch more on this later), I would pretty much surely not buy anything from Creality full price ever again.
At the time of writing, I'm currently in a house with two of these working printers, and both have a few weird assembly differences thanks to Creality. One of the most interesting is that my dad's printer has three ports for a display cable on the back of its display, while mine only has one. Of the three ports on his printer, only one is actually used, and its position corresponds to the port on mine. I just found it interesting that these two equivalent models purchased only a few days apart had a relatively prominent difference.
Gantry shaft loose
The X-axis gantry shaft on my printer seems to be just a bit shorter than my dad's. My dad's printer's shaft is actually a bit loose from the left and right sides; the right side has quite a bit more give, and you can nudge it up and down while the left side stays in place. My printer is much more firm in this way. This difference seems pretty substantial and can make leveling your bed a lot more tricky if yours is too loose.
Faulty display
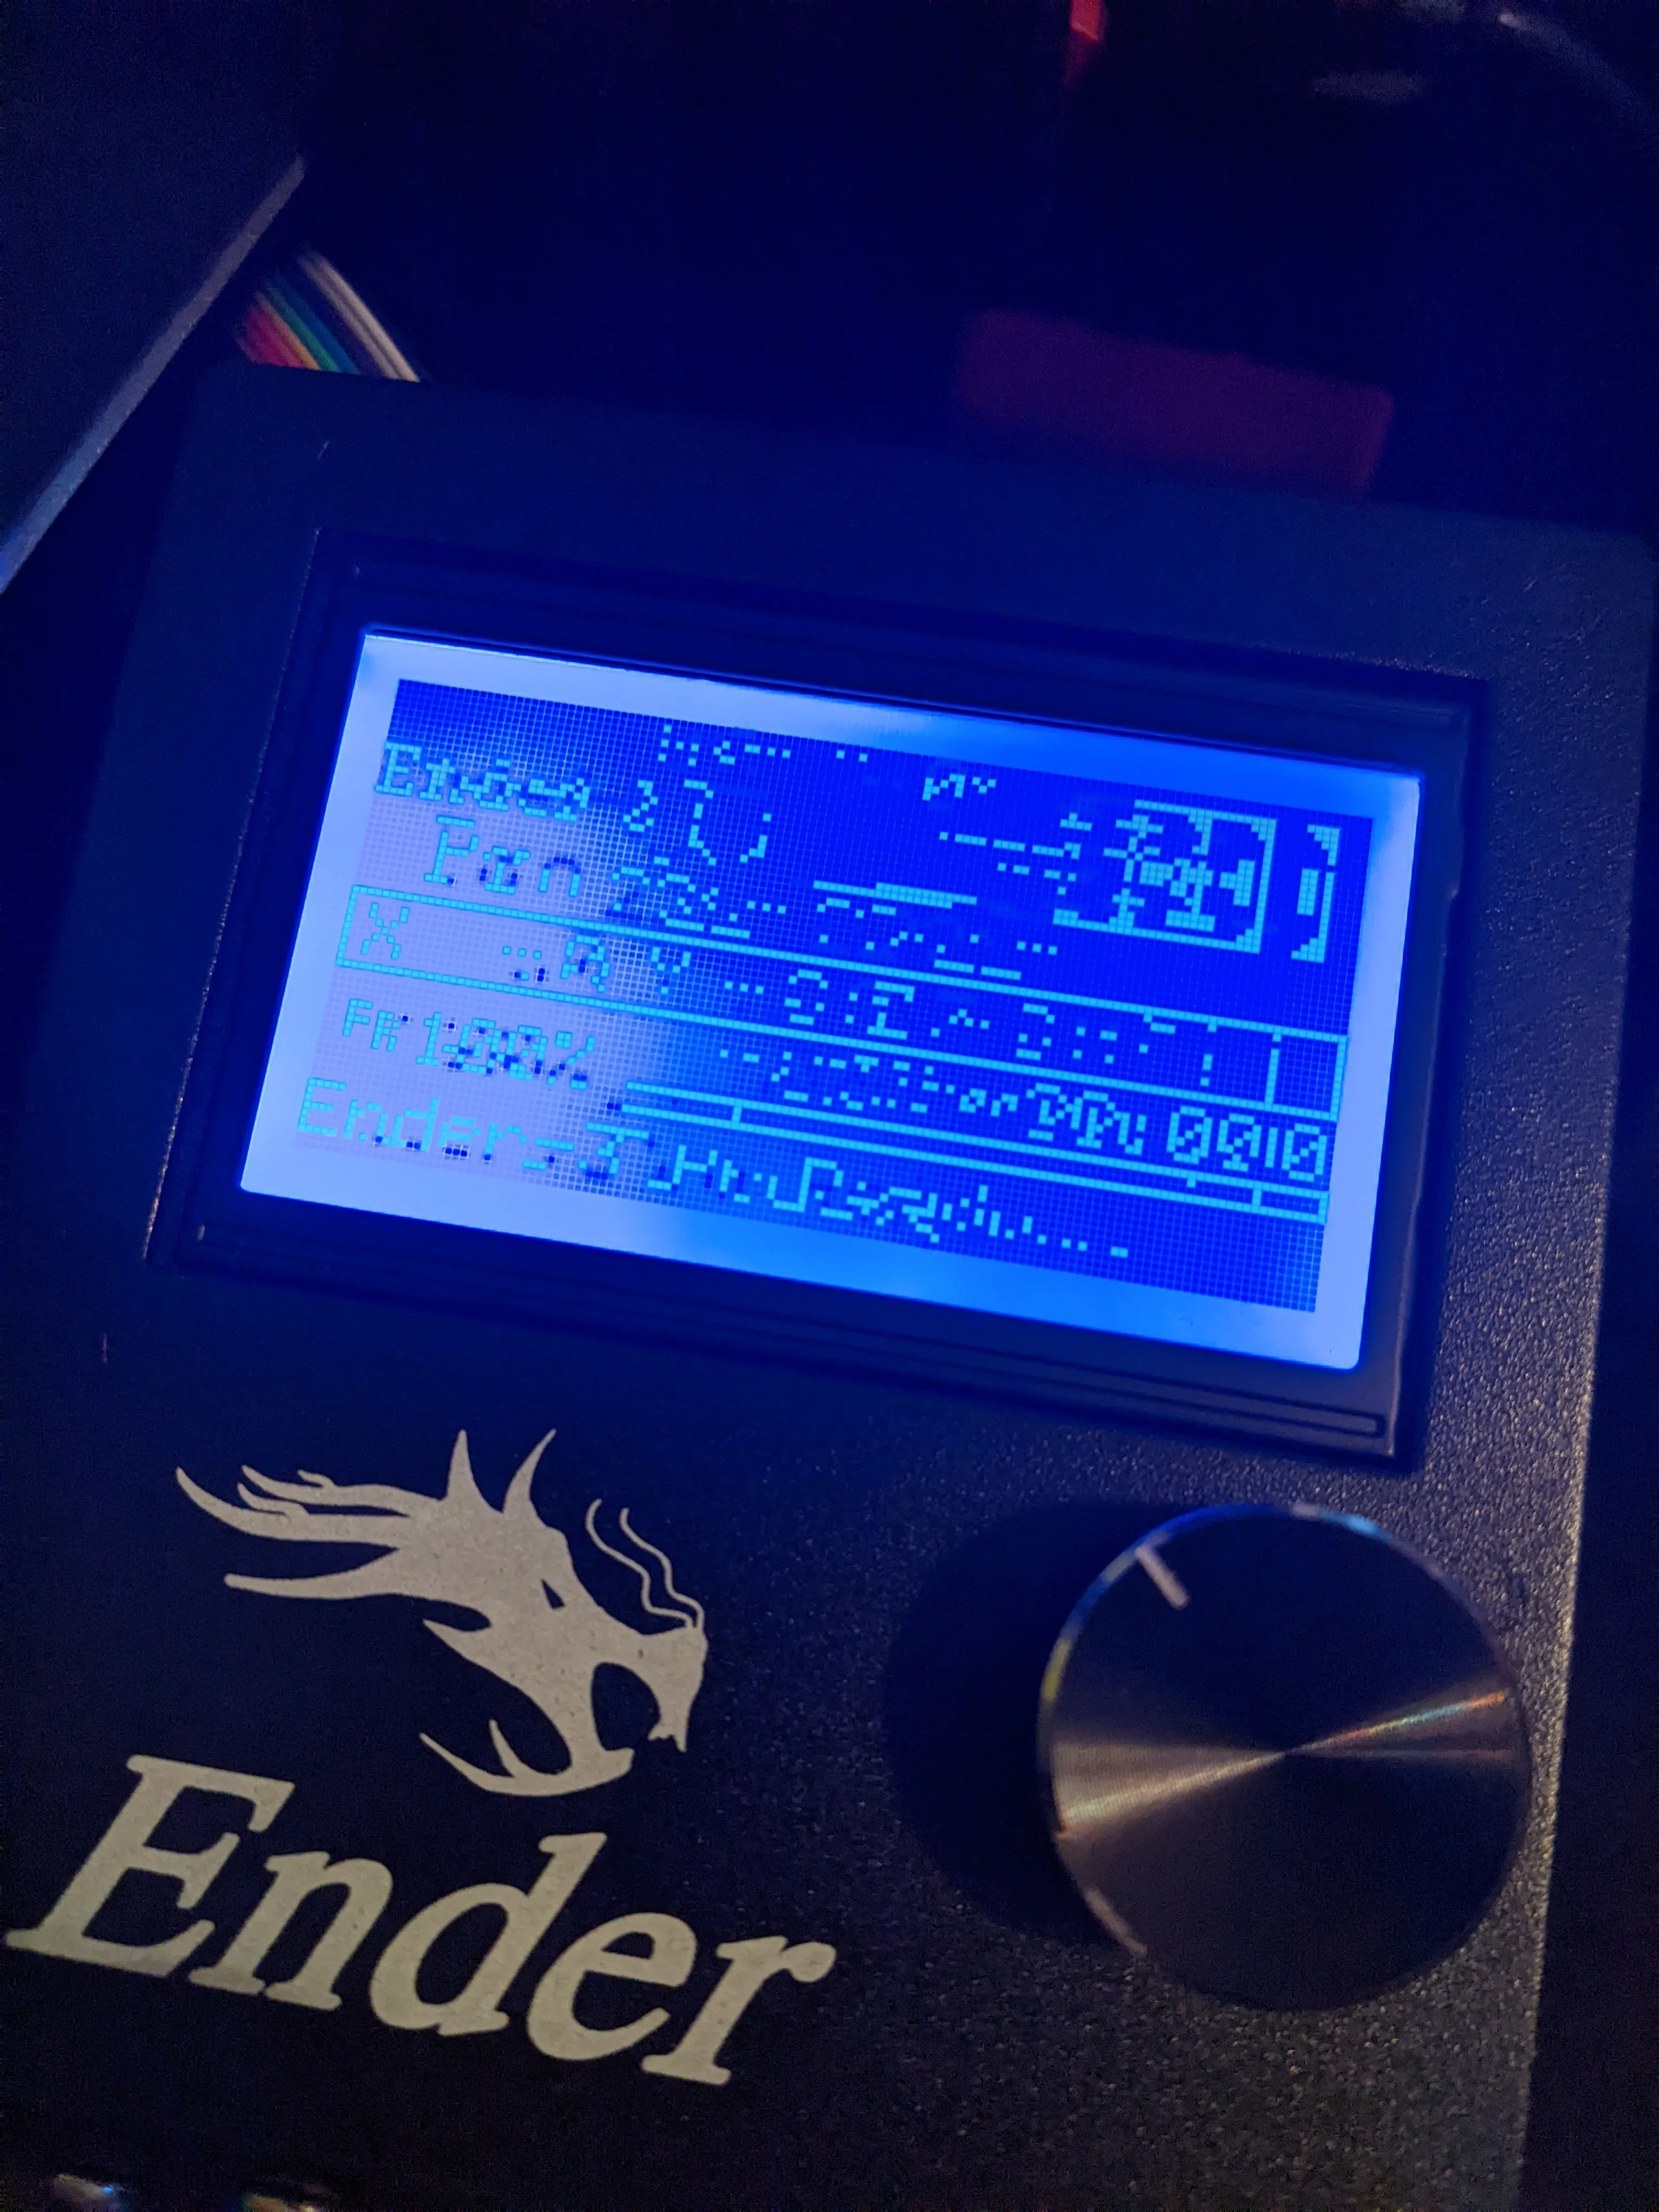
Before my current printer, I had another instance that I had to exchange due to a faulty screen. It would display all jumbled, as depicted above. This was after a firmware flash of what I assumed was the correct firmware, but perhaps was not. I got in touch with good ol' Reddit over this issue, but out of impatience, I exchanged the printer for a new one.
Among other issues
There are certainly more build quality issues that I've yet to notice. For one, my dad ordered a full-metal extruder from Creality, and they'd forgotten to tapone of the major screw holes, making the product literally unusable without tampering in post.
All in all, what I'm trying to say is that you've got to expect some room for error when it comes to these printers. Fortunately, Micro Center's return/exchange policy is relatively light if you're good about making sure everything is returned and you didn't print anything major beforehand. I was blessed with the unfortunate displeasure of driving three hours for a five minute exchange of a faulty printer.
SD card corruption
After building my second printer, I got ready to flash the Creality firmware that comes with support for Creality's CR Touch bed leveling kit. After doing so, I was unable to save any of the settings (like the Z-Probe offset you're required to set up). They would all just wipe the SD card and corrupt it with invalid files and data.
Frustrated at the world, I tried flashing it with everything else that might work. One thing Creality does not tell you is your mainboard version. Of all Ender-3 Pros, there are four variants:
- 8-bit, mainboard 1.1.1
- 8-bit, mainboard 1.1.2
- 32-bit, mainboard 4.2.2, and
- 32-bit, mainboard 4.2.7
This is hidden on your mainboard in the bottom left of the printer. My printer shipped as a 4.2.2, which is very important to know!
What I decided to do, and what you should almost definitely do, is build my own copy of Marlin, a widely used open-source printer firmware that Creality's garbage is based on. There are lots of guides on how to do this online, and most of them are actually pretty decent.
Building Marlin from source
Building your own firmware from source might seem daunting, but it's actually pretty simple. You also get control over hundreds of configuration settings that Creality otherwise wouldn't expose to you. Best of all: it just works. I'd say if you're having any potentially firmware-related problems, you should give building Marlin from source a shot.
I'll go over a really rough process of how you can do this. Remember, I'm using an Ender-3 Pro (mainboard 4.2.2) with a CR Touch, building on Windows.
Installing the IDE
To build Marlin, you'll need a special IDE and a few extensions, but it's mostly a simple process to set up.
You'll want to install the following:
Once you've installed VS Code, you'll want to install the PlatformIO IDE extension. Once you've installed everything, you can move on to configuring and building Marlin.
Getting Marlin
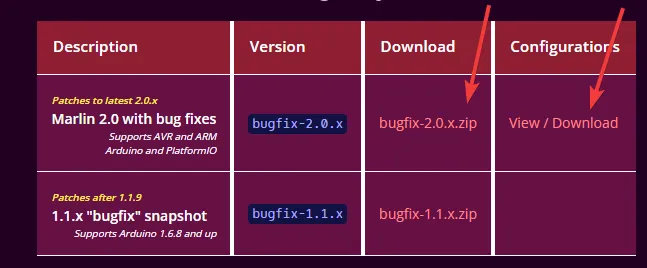
Start by heading to the
Marlin download page. You'll want to
download the bugfix-2.0.x.zip file, then click View / Download to the right
of it. The bugfix-2.0.x.zip file contains the source code for the Marlin
firmware.
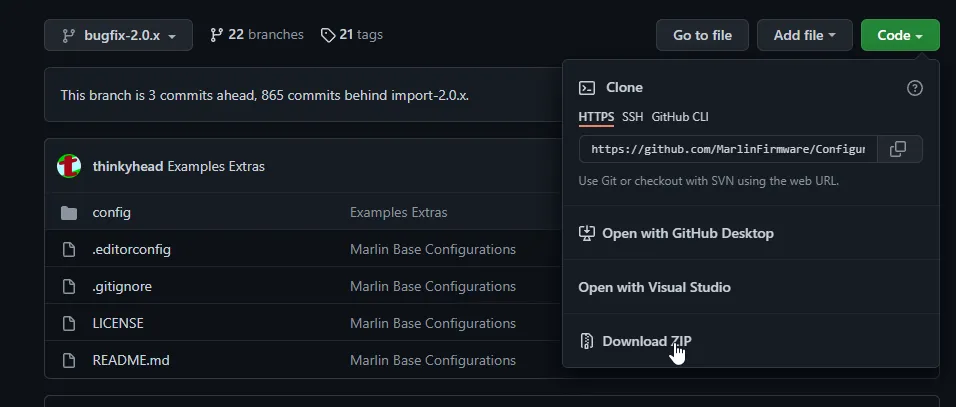
Now, you'll want to download the base configurations for all the printers Marlin
supports. On the next page, click the big green Code button, then click
Download ZIP to download it.
Now set aside a new folder somewhere, and move the two ZIP files you've just downloaded into it. Extract both.
In your File Explorer, open up the new Marlin-bugfix-2.0.x folder until you're
in a folder that has a file called Makefile in it.
Now, you'll want to move the config files for your printer into the source code
for Marlin. Inside the folder you're in, open the Marlin folder. Open a new
File Explorer window, and navigate into the configuration folder you extracted
from the configuration ZIP. Once you're in the folder that has another folder
named config in it, follow it down the path
config/examples/Creality/Ender-3 Pro/CrealityV422. In that folder, move all of
the files ending in .h into the Marlin folder you have open on the side.
Replace any files that conflict.
Open back up VS Code, and open the folder that has Marlin in it (you can go to
File > Open Folder... to open it). Using the explorer on the left in VS Code,
open the platformio.ini file, and on the line that says default_envs = ...,
change that line to default_envs = STM32F103RET6_creality.
Configuring Marlin
Now, you can configure marlin using the Marlin/Configuration.h and
Marlin/Configuration_adv.h files in VS Code. Feel free to read around or refer
to places online for extra settings and help. I found
this page
helpful for some of its settings.
As far as configuring CR Touch goes, use CTRL+F to find references to
#define BLTouch, and uncomment that. Then, you'll want to find
#define NOZZLE_TO_PROBE_OFFSET. For the CR Touch, I've personally set the
value to { -45, -6.5, 0 }, which seems to work well.
Building Marlin
Once you've configured Marlin to your liking (search around online for more
tips!), you can click the check mark in the bottom left of VS Code to build the
firmware. It will output to .pio/build/STM32F103RET6_creality/xxxxxx.bin.
Installing Marlin
Now that you've got that bin file, stick it on your FAT32 formatted micro SD card, and stick that in your printer. Turn it on. Wait a couple seconds for the blank screen to go away, and congrats! You've installed Marlin.
Setting up CR Touch
Setting up CR Touch is relatively straight forward. After turning your printer
on, navigate to Motion > Auto Home to let your printer figure out where its
printhead is. You can also optionally go to Motion > Bed Leveling > Level Bed
for good measure. After you've done that, head to
Motion > Move Axis > Move Z > Move 10mm, and move it to +000.0.
Now, whip out a sheet of 8.5x11 paper, and place it on your printbed. Navigate
to Motion > Bed Leveling > Probe Z Offset and crank that value down while
wiggling the paper in place just until you feel some resistance on the paper.
When you've hit that point, pull the sheet of paper out, and you can press the
dial in to exit the offset setting process. Scroll down to Store Settings so
your printer remembers this number.
Before you start any prints, it's a good idea to go back to
Motion > Move Axis > Move Z > Move 10mm and move your printhead up to about
+020.0 or so, to avoid the nozzle heating up right next to the bed.
Leveling the bed in your slicer
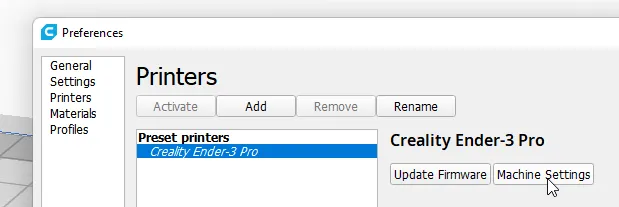
As a slicer, I've personally been using Ultimaker Cura, and I can't recommend it enough, so I'll be showing the steps for getting auto bed leveling to work in Cura, but a similar process would probably work for other slicers.
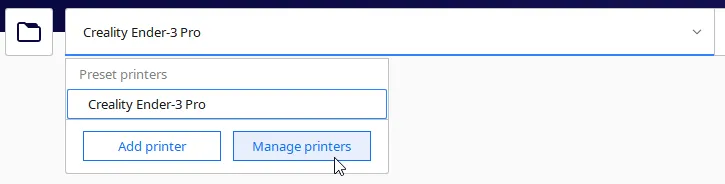
Once you've installed Cura and set your machine to the Ender-3 Pro, navigate through the following menus:
Once you're here, insert the line G29 right after the one that has G28 under
Start G-code, like such:
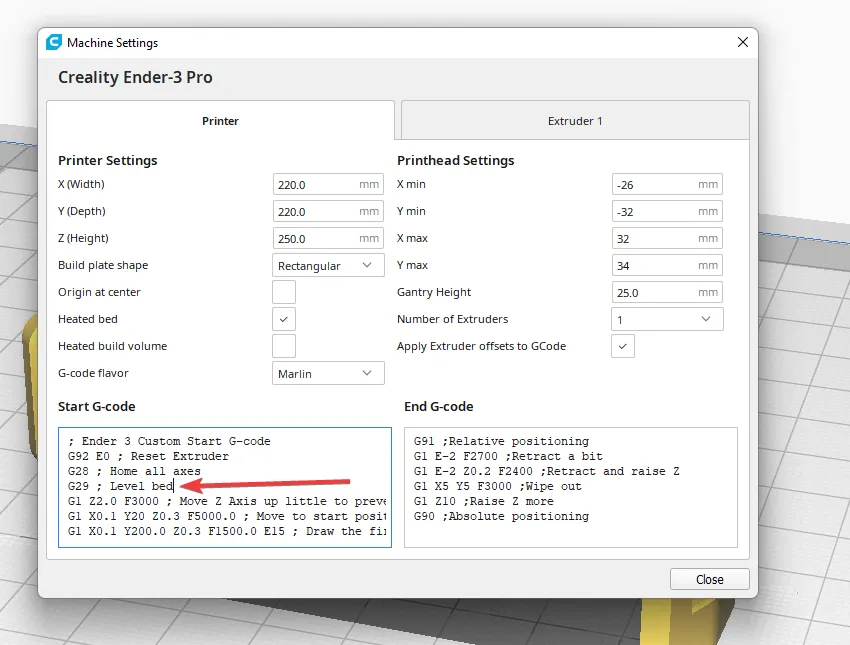
Now, all future slices will level the bed with CR Touch for optimal adhesion.
Print!
You're this far, you've installed your own firmware, and everything should be working with CR Touch/BLTouch. Print something! If you print something cool or run into an issue with my steps, email me and show me or let me know.
Here's a few of the small things I printed to give you some ideas:
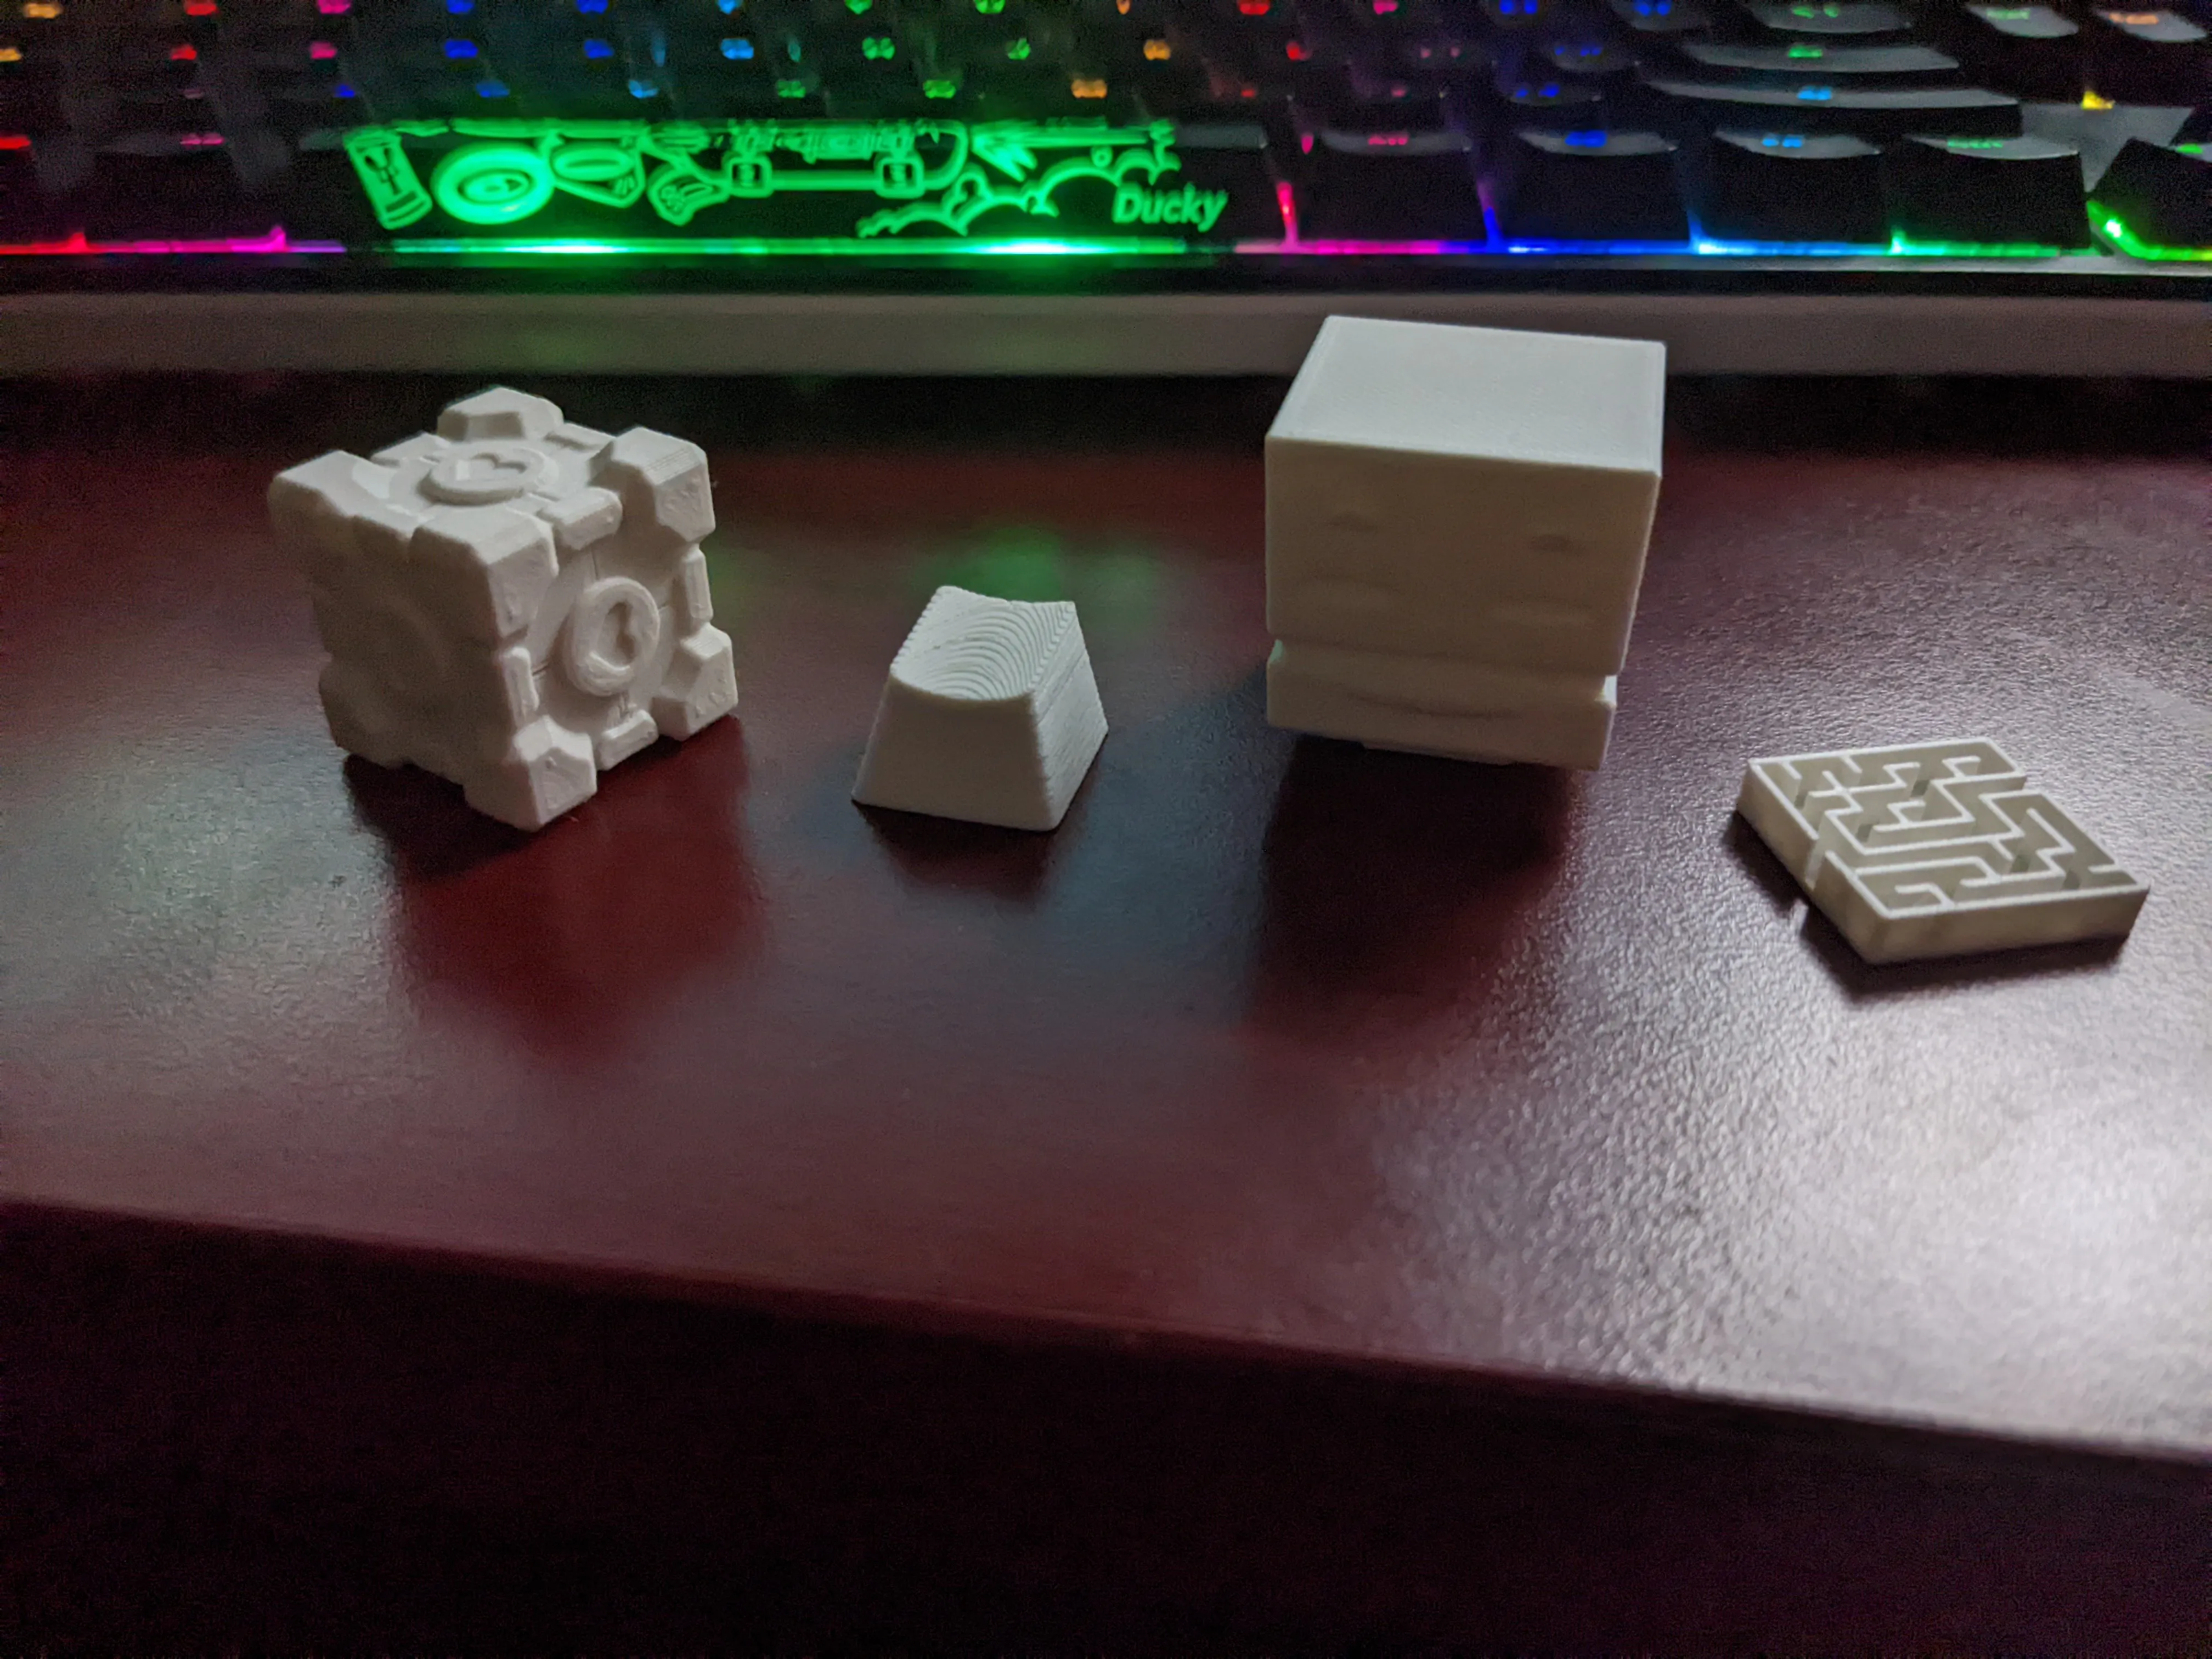
Happy printing!